about
I'm Dobby — exploring decentralized systems and building secure, open infrastructure across Bitcoin, Ethereum, and Solana.
tech stack
- Solidity, Rust, TypeScript, Go
- Next.js, Wagmi, Anchor, Hardhat
- zk-SNARKs, Bitcoin scripting, L2 research
- IPFS, RPC optimization, validator setups
projects (soon)
BTC Auth
Bitcoin-based authentication using signed messages. Experimental decentralized identity layer.
SolPortal
Portfolio tracker built on Solana, visualizing tokens and NFTs via real-time RPC feeds.
zk-Playground
Exploring zk-proof systems and Noir circuits for EVM-compatible applications.
blog
Swapping ETH to BTC on Rift: A Step-by-Step Guide
As a Web3 enthusiast, I've been exploring cross-chain swaps, and Rift (app.rift.trade) offers a seamless way to exchange Ethereum (ETH) for Bitcoin (BTC). In this guide, I'll walk you through the process, using a real example where I swapped $50 worth of USDT (tethered to ETH) for BTC. This is a manual based on the app's interface, with screenshots for clarity.
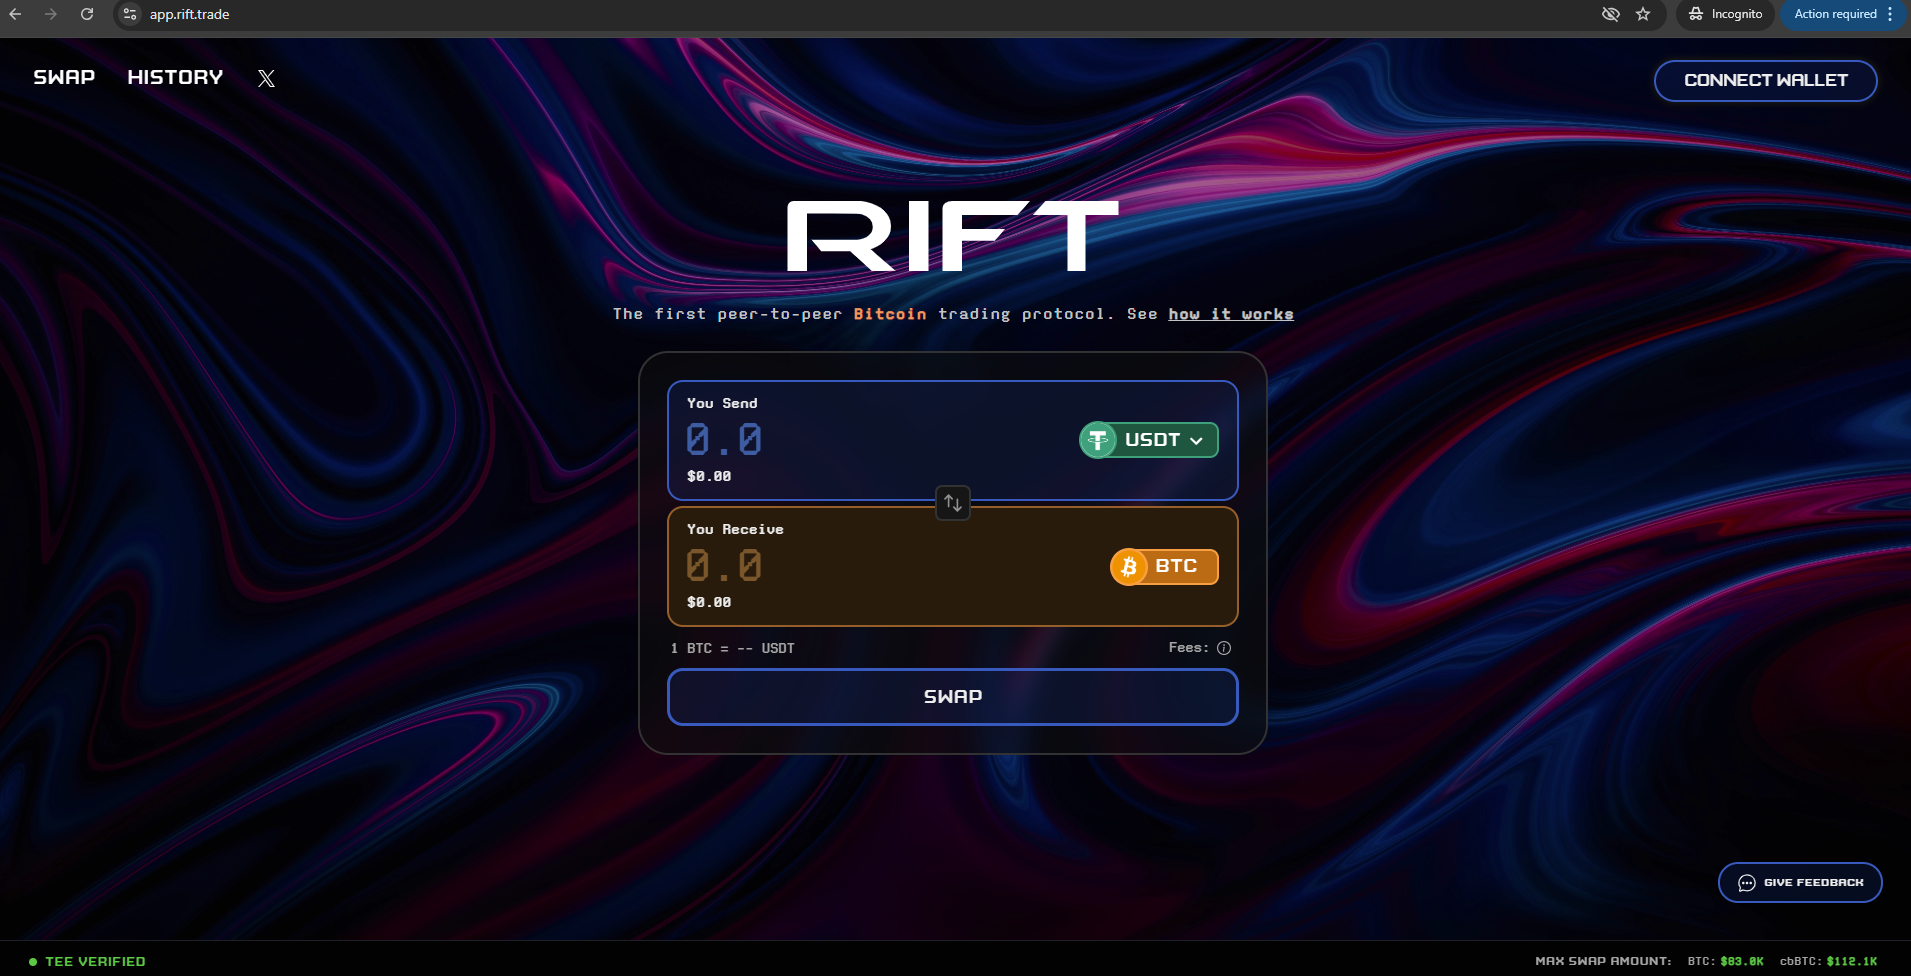
Step 1: Access the Rift Interface
Visit app.rift.trade and connect your wallet. The initial interface looks like this:
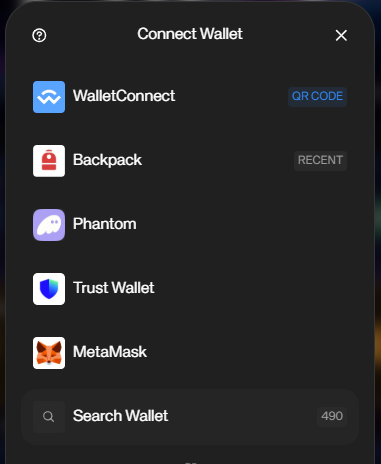
Step 2: Connect Your Wallet
Click on the wallet connection button to link your Ethereum-compatible wallet (e.g., MetaMask). Ensure you have ETH or USDT in your wallet.
Step 3: Enter the Swap Amount
Select ETH as the source and BTC as the destination. Enter the amount you want to swap. In my example, I swapped $50 USDT equivalent.
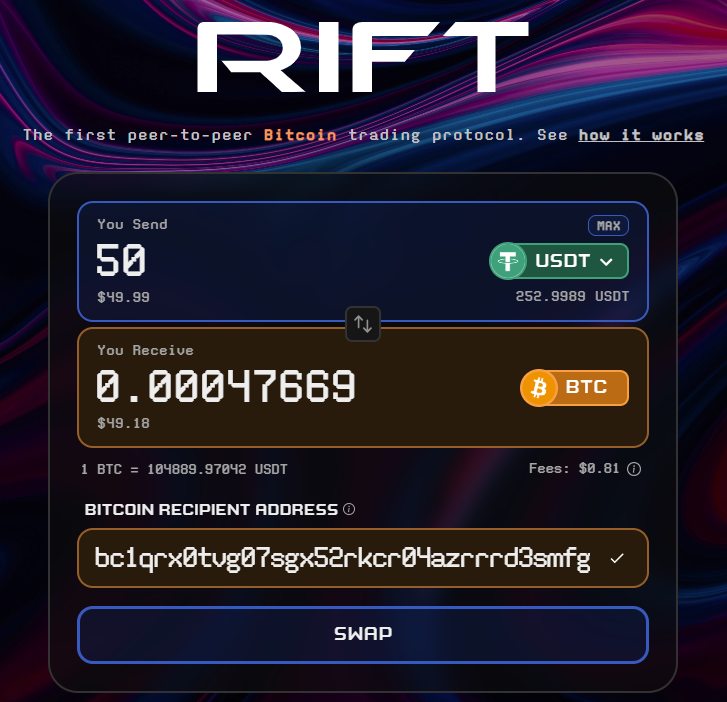
Step 4: Initiate the Swap
Review the details, including any fees, and confirm the transaction. The app will handle the cross-chain logic.

Step 5: Swap Complete
Once processed, you'll see the confirmation. Your BTC should arrive in your connected wallet shortly.

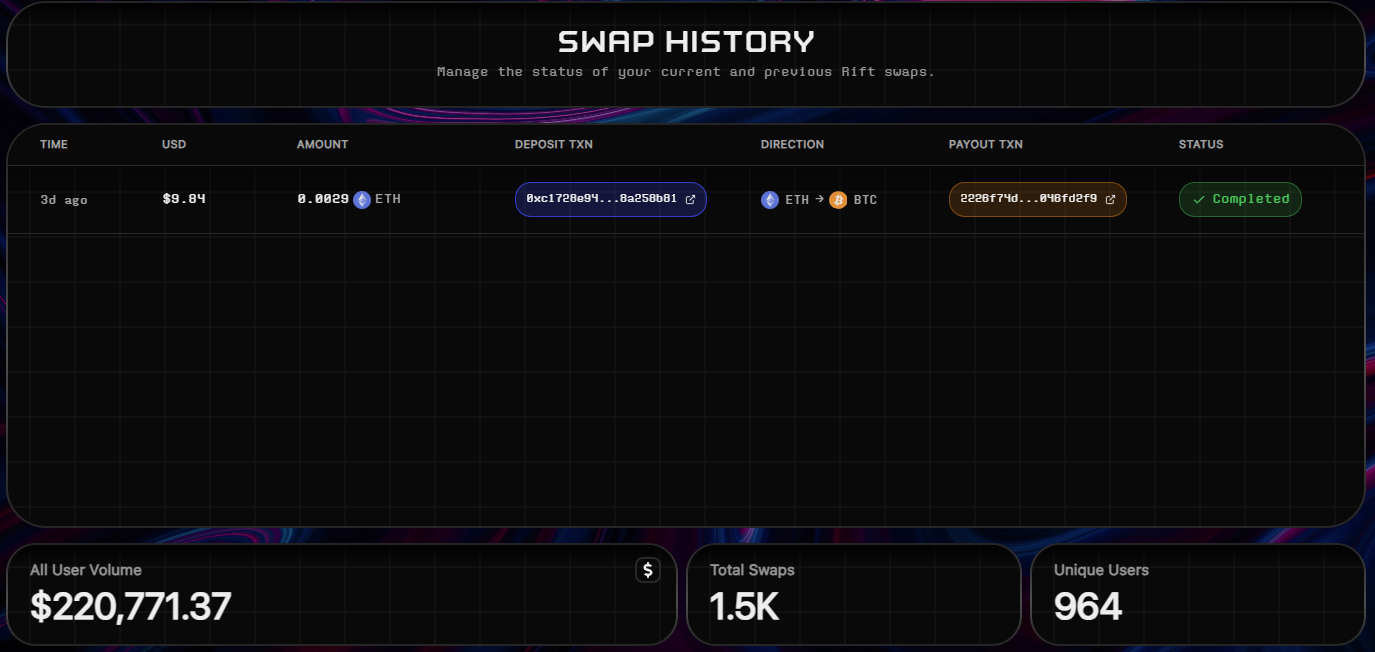
Step 6: Check Swap History
View your past swaps in the history section for tracking.
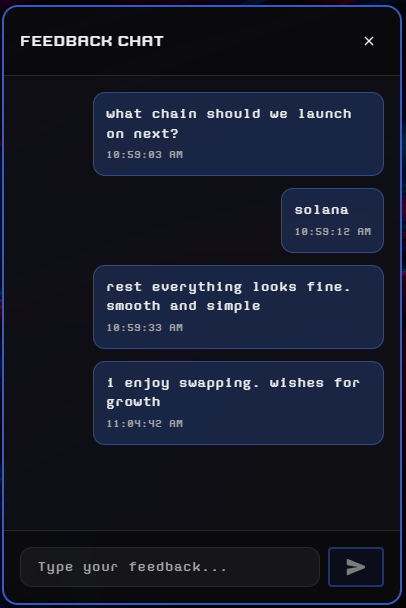
Step 7: Provide Feedback
After the swap, you can leave feedback to help improve the platform.
This process is straightforward and decentralized, leveraging smart contracts for security. Always verify transaction details before confirming. If you have questions, feel free to reach out!
How to Collect SOL by Burning Vacant Accounts and Dust NFTs on Sol-Incinerator
As a Solana user, managing vacant accounts and dust NFTs can help reclaim SOL and clean up your wallet. Sol-Incinerator (sol-incinerator.com) provides a simple tool to burn these assets and recover the rent-exempt SOL. In this guide, I'll walk you through the process step by step, using screenshots for clarity.
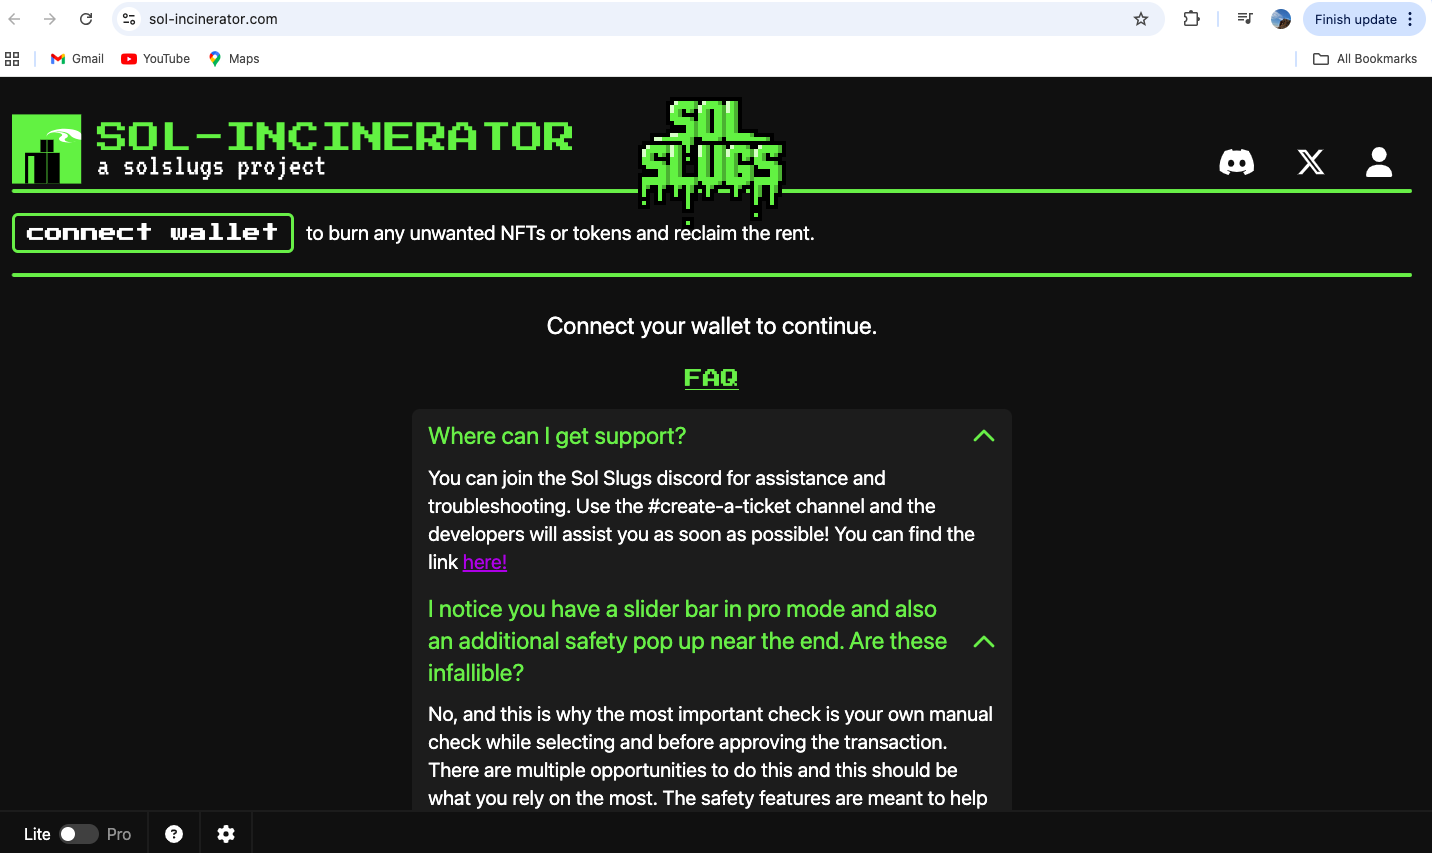
Step 1: Go to Sol-Incinerator.com
Visit sol-incinerator.com to access the incinerator interface. The site is designed for burning Solana assets.
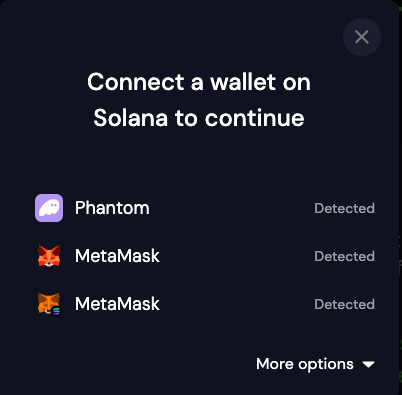
Step 2: Connect the Wallet
Connect your Solana-compatible wallet (e.g., Phantom or Solflare) to the site. Ensure your wallet has vacant accounts or dust NFTs to burn.
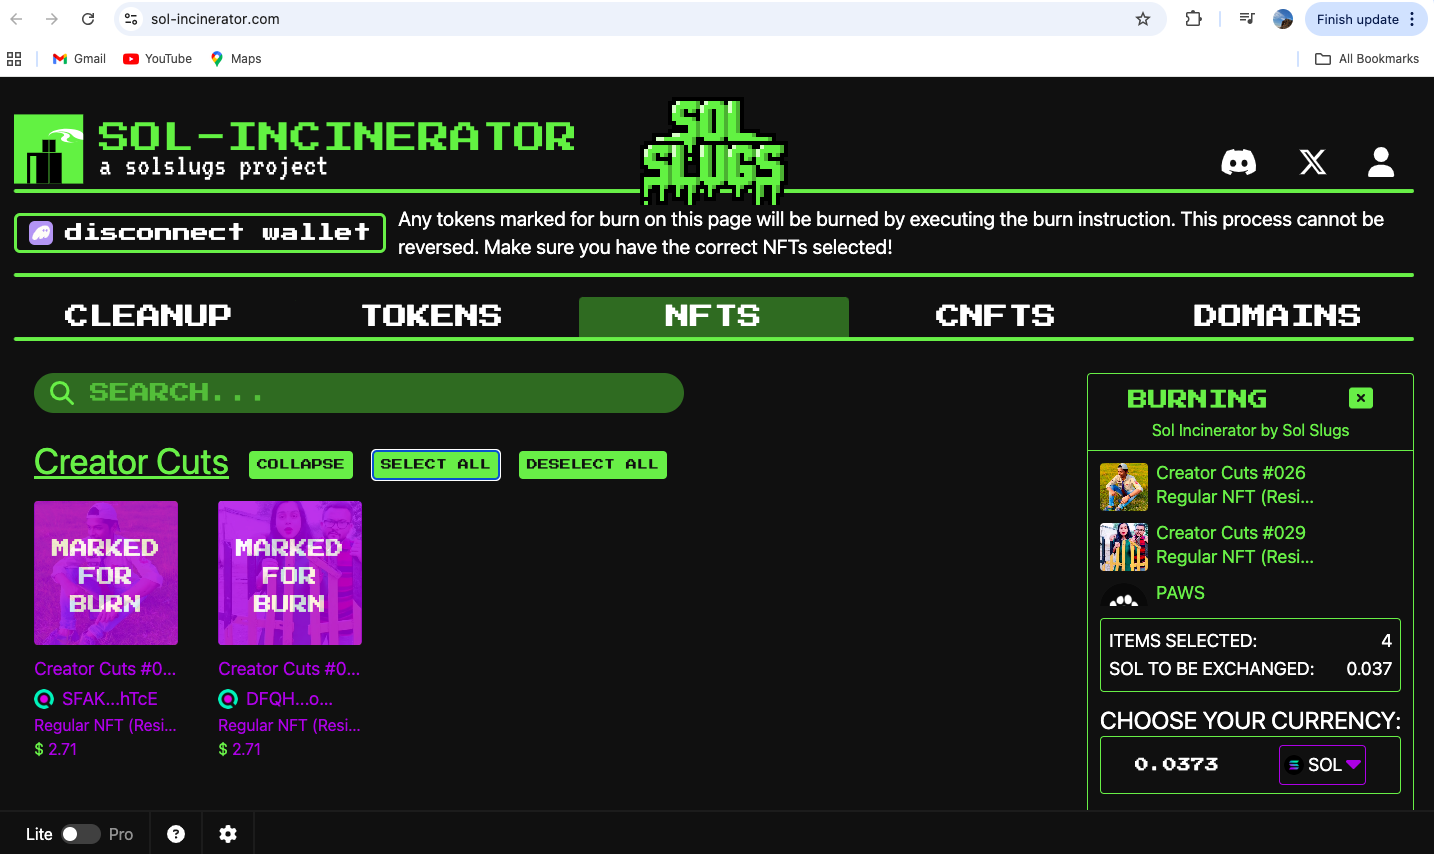
Step 3: Select Wallet NFTs
Once connected, the interface will display your NFTs and accounts. Select the vacant accounts and dust NFTs you want to burn.
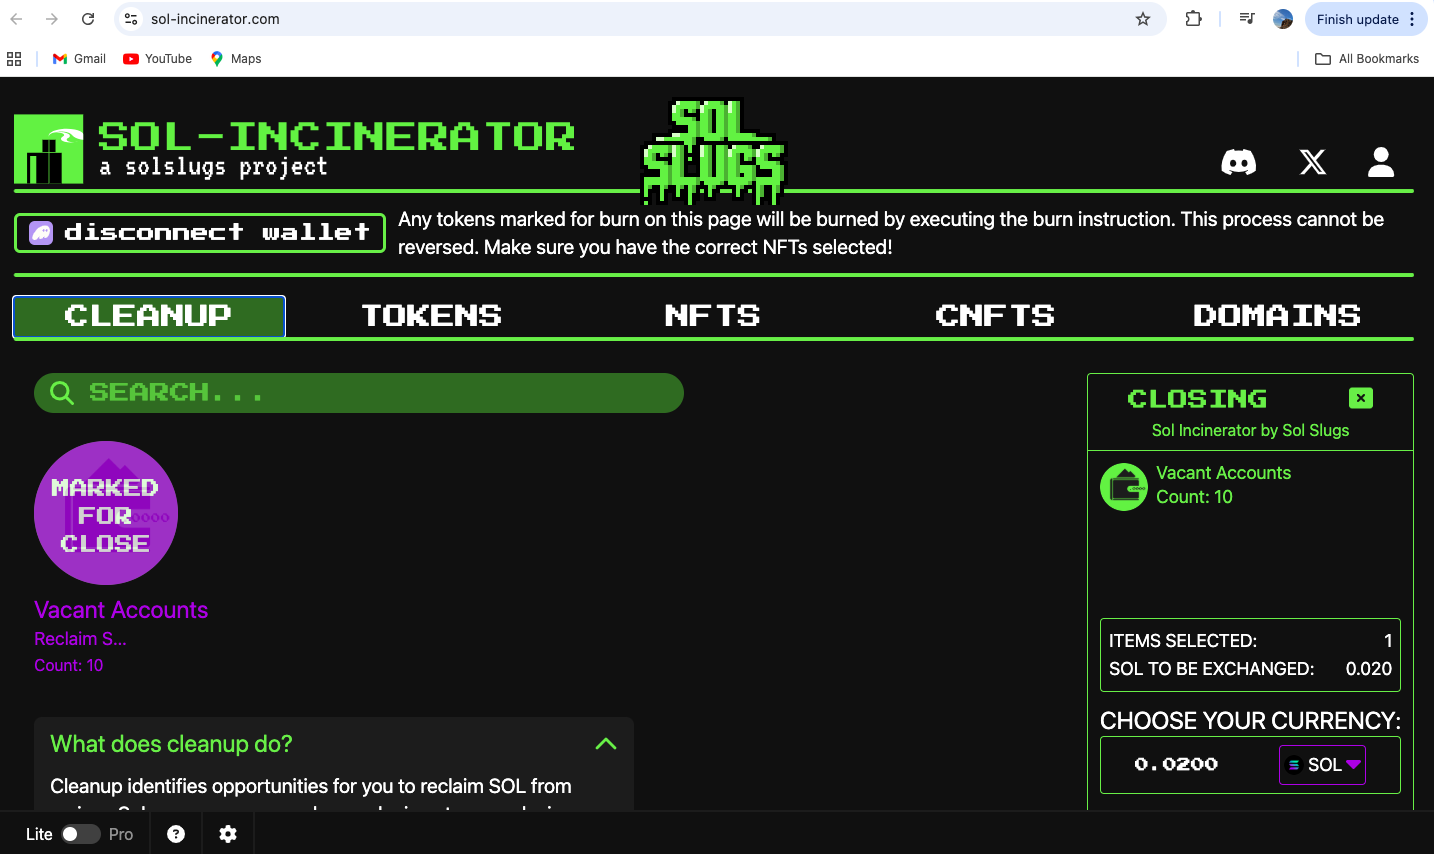
Step 4: Select Wallet NFTs (Continued)
Review and confirm the selection of assets. Make sure only unwanted items are chosen to avoid accidental burns.
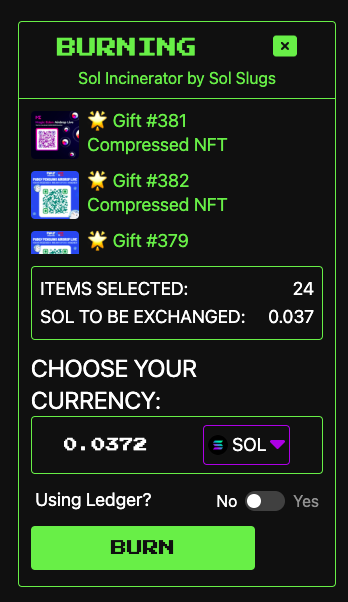
Step 5: Burn Them
Initiate the burn process by clicking the burn button. This will close the accounts and recover the SOL.
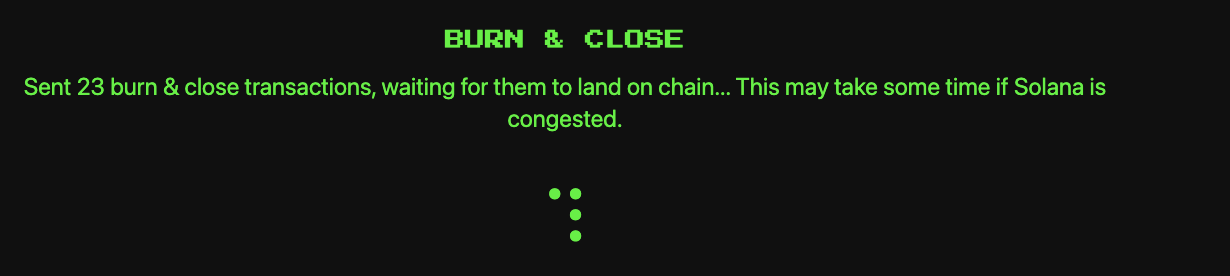
Step 6: Burn Process
The burn process will execute on-chain. Monitor the transaction status in your wallet.
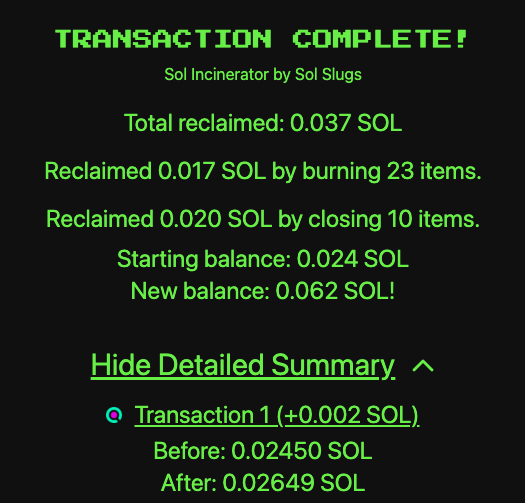
Step 7: Complete Process Collect SOL
Once completed, the SOL from the burned accounts will be collected back into your wallet.
Step 8: Check History Give Feedback
Check the history of your burns and provide feedback on the platform to help improve it.

This method is efficient for reclaiming SOL from unused assets on Solana. Always double-check selections before burning, as the process is irreversible.
contact
Say hi on @dobby.